

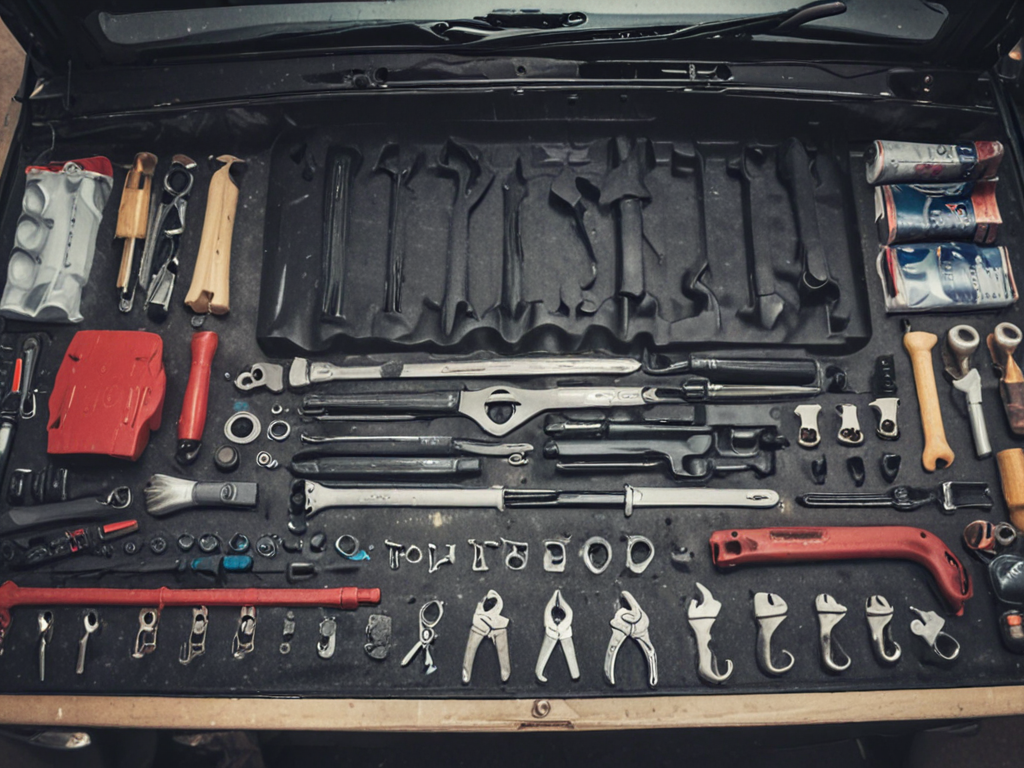
As I commence on the journey of unraveling the intricacies of car maintenance for beginners, let’s explore a detailed checklist that can serve as a solid foundation for your DIY endeavors. From ensuring your safety with proper precautions to mastering the art of changing engine oil and spark plugs, there is a myriad of tasks awaiting your attention under the hood and around your vehicle. However, the true essence lies not just in performing these tasks but understanding the inner workings of your car to become a more confident and knowledgeable owner.
Safety Precautions
When working on DIY car maintenance, it is vital to prioritize safety precautions to prevent accidents and injuries. Safety gear essentials play an important role in ensuring your well-being during maintenance tasks. Before starting any work on your vehicle, always remember to wear appropriate safety gear such as gloves, safety goggles, and closed-toe shoes. These items provide protection against cuts, burns, eye injuries, and other potential hazards that may arise while working on your car.
In addition to safety gear essentials, preparing an emergency kit is a proactive measure to handle unexpected situations effectively. Your emergency kit should include items such as a first aid kit, a flashlight with extra batteries, reflective triangles or road flares for visibility in case of a breakdown, a tire pressure gauge, and basic tools like a wrench and screwdriver. Being prepared with an emergency kit can make a significant difference in handling unforeseen circumstances safely and efficiently.
Checking Fluid Levels
When checking fluid levels in your car, it is critical to inspect the oil level to make sure proper lubrication of the engine. Additionally, examining the coolant level is essential for preventing overheating and maintaining engine efficiency. Both of these tasks are fundamental in maintaining the health and performance of your vehicle.
Oil Level Check
To properly maintain your vehicle, regularly checking the oil level is essential. Keeping track of the oil level ensures that your engine stays lubricated and performs at its best. Here are five key steps to effectively check your oil level:
- Park on a Level Surface: Make sure your vehicle is parked on a flat surface to get an accurate oil reading.
- Locate the Dipstick: The dipstick is usually a brightly colored handle labeled ‘engine oil.’
- Wipe and Reinsert the Dipstick: After removing the dipstick, wipe it clean, reinsert it fully, and then pull it out again to check the oil level.
- Check the Oil Color and Consistency: Fresh oil is amber-colored and translucent. Dark or gritty oil indicates the need for an oil change.
- Monitor the Oil Level: The oil on the dipstick should fall between the minimum and maximum marks; if it’s below the minimum, add oil as needed.
Coolant Level Inspection
Inspecting the coolant level in your vehicle is a critical maintenance task that secures engine performance and prevents overheating. The coolant system plays a crucial role in regulating the engine temperature, ensuring it operates within safe limits. To check the coolant level, start by allowing the engine to cool. Locate the coolant reservoir, typically a translucent plastic tank with high and low markings. The coolant level should be between these markers when the engine is cold. If it’s below the minimum line, you can top it up with a mixture of coolant and water as recommended by the manufacturer. Regularly monitoring and maintaining the coolant level is essential for the best engine function and effective overheating prevention.
Changing Engine Oil
Consider utilizing a specialized wrench to loosen the oil drain plug during the process of changing engine oil. It is important to make sure you have all the necessary tools and equipment ready before you begin this task. Here are some key steps to changing your engine oil effectively:
- Drain the Old Oil: Position the drain pan under the oil pan, remove the drain plug, and allow the old oil to flow out completely.
- Replace the Oil Filter: After draining the oil, locate the oil filter and use an oil filter wrench to remove it. Make sure to lubricate the gasket of the new oil filter before installation.
- Add New Oil: Pour the appropriate amount and type of new oil into the engine. Refer to your vehicle’s manual for the correct oil viscosity and quantity.
- Dispose of Old Oil Properly: Do not dump the old oil down the drain. Collect it in a container and take it to a recycling center or an auto parts store that accepts used oil for proper disposal.
- Tighten the Drain Plug and Oil Filter: Make sure the drain plug and oil filter are securely tightened to prevent leaks.
Inspecting and Changing Air Filters
Inspecting and changing air filters is important for maintaining top-notch engine performance. Regular inspection guarantees that the filter is clean and functioning correctly, preventing dust and debris from entering the engine. Properly replacing air filters according to the manufacturer’s guidelines helps to improve fuel efficiency and prolong the life of your vehicle’s engine.
Filter Inspection Importance
Ensuring proper airflow in your vehicle’s engine is important for best performance and longevity. Regular air filter maintenance offers efficiency benefits and can lead to significant cost savings. Here are some key points to take into account when inspecting your air filter:
- Frequency: Check your air filter every 12,000 to 15,000 miles or as recommended by your vehicle’s manual.
- Visual Inspection: Look for dirt, debris, or clogs that may restrict airflow.
- Replacement Signs: Take into account replacing the filter if it appears dirty or if you notice reduced engine performance.
- DIY Cleaning: Some air filters are reusable and can be cleaned with compressed air or a vacuum.
- Professional Opinion: If unsure, seek advice from a mechanic for proper maintenance guidance.
Proper Filter Replacement
To maintain best engine performance and longevity, timely replacement of your vehicle’s air filter is essential. When considering air filters, there are two main types: paper and reusable filters. Paper filters are inexpensive and need to be replaced more frequently, while reusable filters are pricier but can be cleaned and reused multiple times. When replacing your air filter, make sure the engine is cool and disconnect the battery to prevent any mishaps. Locate the air filter housing, usually a plastic box near the engine, and carefully remove the old filter. Check the owner’s manual for the correct replacement filter and insert it following the airflow direction arrows. Secure the housing and reconnect the battery. Regularly changing your air filter will help maintain best engine performance and fuel efficiency.
Testing and Replacing Spark Plugs
Testing and replacing spark plugs is an essential aspect of maintaining a car’s engine performance and fuel efficiency. Spark plugs play a critical role in the ignition system, providing the spark needed to ignite the air-fuel mixture in the engine cylinders. To guarantee peak performance, it’s important to regularly inspect and replace spark plugs as needed.
Markdown Bullet List:
- Check the Spark Plug Gap: Use a gapping tool to make sure the gap between the center and ground electrode is within the manufacturer’s specifications.
- Inspect Spark Plug Wires: Look for any signs of damage, such as cracks or wear, and replace if necessary to maintain proper spark delivery.
- Clean Spark Plug Ports: Remove any debris or buildup from the spark plug ports to prevent misfires and maintain efficient combustion.
- Choose the Right Spark Plugs: Select the correct type and heat range of spark plugs recommended for your vehicle to optimize performance.
- Perform Regular Ignition System Maintenance: In addition to spark plug replacement, remember to inspect and maintain other ignition system components like the ignition coils and distributor cap.
Checking and Rotating Tires
When it comes to maintaining your car’s tires, two critical aspects to contemplate are tire pressure monitoring and ensuring proper tread depth. These factors play an essential role in your vehicle’s overall performance, handling, and safety on the road. Regularly checking and rotating your tires can help extend their lifespan and promote even wear, ultimately saving you money in the long run.
Tire Pressure Monitoring
Checking tire pressure regularly and rotating tires as needed are critical maintenance tasks to guarantee peak performance and safety of your vehicle. Maintaining proper tire pressure is essential for various reasons, including improved fuel efficiency, extended tire lifespan, and enhanced handling. Here are some key points to take into account when monitoring tire pressure:
- Regular Check-ups: Inspect tire pressure at least once a month.
- Recommended PSI: Refer to the vehicle manual for best pressure levels.
- Temperature Consideration: Pressure can fluctuate with temperature changes.
- Visual Inspection: Look for signs of wear or damage while checking pressure.
- Rotation Schedule: Rotate tires every 5,000 to 8,000 miles for even wear distribution.
Proper Tread Depth
Guaranteeing the appropriate tread depth on your tires is crucial for maintaining peak performance and safety while driving your vehicle. Sufficient tread depth allows for proper traction, especially in wet or slippery conditions, reducing the risk of accidents. To check your tire’s tread depth, use a tread depth gauge or the penny test to guarantee it meets the recommended depth of at least 2/32 of an inch. Additionally, regularly rotating your tires promotes even tread wear, extending their lifespan and improving overall performance. Don’t forget to also schedule periodic alignment checks to guarantee your tires wear evenly and your vehicle handles properly. By monitoring tread depth, tire pressure, and alignment, you can enhance your driving experience and safety on the road.
Inspecting Brake Pads and Rotors
Inspecting the brake pads and rotors is a critical task in maintaining the safety and performance of your vehicle. The brake system is fundamental to your car’s operation, and regular inspections can prevent accidents and costly repairs down the line. Here are some essential tips for inspecting your brake pads and rotors:
- Check for Brake Pad Wear: Look through the wheel spokes to see the thickness of the pad. If it’s less than 1/4 inch, it’s time for a replacement.
- Inspect Rotor Damage: Check for deep grooves, scoring, or discoloration on the rotor surface. Any signs of damage may require resurfacing or replacement.
- Listen for Brake Squealing: High-pitched squealing sounds while braking can indicate worn-out brake pads that need immediate attention.
- Feel for Vibrations: If you feel vibrations or pulsating sensations when braking, it could be a sign of uneven rotor wear or warping.
- Monitor Brake Fluid Levels: Low brake fluid levels can indicate a leak or worn brake components, so make sure the fluid is at the recommended level.
Regularly inspecting your brake pads and rotors is critical for your safety on the road. By following these maintenance tips, you can make sure your vehicle’s braking system is in the best condition, providing you with peace of mind while driving.
Replacing Wiper Blades
To guarantee top visibility during adverse weather conditions, proper maintenance of wiper blades is essential for every vehicle owner. Wiper blade maintenance involves periodic checks for wear and tear, as damaged blades can hinder visibility and compromise safety on the road. When the rubber on the wiper blades becomes cracked or torn, it’s time to replace them. Luckily, replacing wiper blades is a straightforward task that can be done at home with minimal tools and effort.
When it comes to blade replacement techniques, start by lifting the wiper arm away from the windshield. Most wiper blades have a small tab that needs to be pushed to release the blade from the wiper arm. Once the old blade is removed, attach the new blade by following the manufacturer’s instructions. Make sure the new blade is securely in place before gently lowering the wiper arm back onto the windshield.
Regularly replacing wiper blades not only ensures clear visibility but also extends the life of the windshield wiper system. By incorporating wiper blade maintenance into your car care routine, you’ll be better prepared to tackle challenging weather conditions and drive safely on the roads.
Cleaning Battery Terminals
Cleaning battery terminals is an essential maintenance task that every vehicle owner should prioritize to guarantee peak performance and longevity of the car’s electrical system. Neglecting the cleanliness of battery terminals can lead to poor electrical connections, voltage irregularities, and ultimately, starting issues. To make sure your car runs smoothly, follow these expert tips on the terminal cleaning process and general battery maintenance:
- Prepare the area: Start by parking your vehicle in a well-ventilated area, away from any open flames or sparks.
- Safety first: Wear protective gear such as gloves and goggles to shield yourself from any battery acid or debris.
- Disconnect the battery: Prior to cleaning, disconnect the negative terminal first, followed by the positive terminal, to avoid any electrical mishaps.
- Clean the terminals: Use a mixture of baking soda and water to create a paste and scrub the terminals with a brush to remove any corrosion or dirt.
- Rinse and dry: After cleaning, rinse the terminals with water and dry them thoroughly with a clean cloth to prevent any residual corrosion.
Regularly cleaning your battery terminals and following these battery maintenance tips will not only enhance the performance of your vehicle but also extend the lifespan of your car’s electrical system.
Checking and Topping Off Coolant
When examining your vehicle’s coolant system, it is important to first check the coolant level, ensuring it falls within the recommended range. If the level is low, topping off the coolant with the appropriate type is essential to prevent overheating and maintain best engine performance. Regularly monitoring and adjusting the coolant level will help safeguard your engine from potential damage and costly repairs.
Coolant Level Inspection
Inspecting the coolant level in your vehicle requires attention to detail and a few simple steps to guarantee your engine stays properly cooled. When checking the coolant level, make sure the engine is cool and the vehicle is parked on a level surface. Here are some key steps to follow:
- Open the hood and locate the radiator and coolant reservoir.
- Identify the ‘Max’ and ‘Min’ marks on the coolant reservoir to determine the current level.
- If the coolant level is below the ‘Min’ mark, top it off with a mixture of coolant and water as recommended by the manufacturer.
- Perform a visual inspection for any leaks in the coolant system.
- Consider scheduling a coolant system flush and radiator inspection periodically to maintain the best engine performance.
Proper Coolant Top-Up
To guarantee your vehicle’s coolant system operates efficiently, maintaining the appropriate coolant level is vital for peak engine performance and longevity. Proper coolant top-up is essential for coolant system maintenance and preventing overheating issues. Coolant, also known as antifreeze, comes in different types, with each offering specific benefits such as corrosion protection and freezing point reduction. Regularly checking and topping off your coolant ensures that your engine runs at the right temperature and remains protected from extreme conditions. Refer to the table below for a quick overview of common coolant types and their advantages:
| Coolant Type | Benefits |
|---|---|
| Ethylene Glycol | Excellent heat transfer |
| Propylene Glycol | Less toxic, eco-friendly |
| HOAT (Hybrid Organic Acid Technology) | Long-lasting protection |
| OAT (Organic Acid Technology) | Extended coolant life |
Inspecting Belts and Hoses
Are the belts and hoses in your vehicle showing signs of wear and tear that could potentially lead to issues down the road? Proper maintenance of belts and hoses is vital for the overall health and performance of your vehicle. Here are some key steps to keep in mind when inspecting belts and hoses:
- Hose condition evaluation: Inspect hoses for any signs of cracks, bulges, or soft spots that may indicate weakness or impending failure.
- Belt tension check: Check the tension of the belts by pressing down on them; they should have a little give but not be overly loose.
- Hose leak detection: Look for any signs of leaks around the connections of the hoses; even a small leak can lead to a loss of fluid and potential overheating.
- Belt wear assessment: Examine the belts for any fraying, cracks, or glazing on the surface; these are indicators that the belt may need to be replaced soon.
- Visual inspection: Take a close look at all belts and hoses to make sure they are properly aligned, securely attached, and free from any obstructions or rubbing against other engine components.
Regularly checking and maintaining belts and hoses can help prevent unexpected breakdowns and costly repairs. If you notice any issues during your inspection, it is best to address them promptly to keep your vehicle running smoothly.
Examining Lights and Signals
Upon conducting a thorough examination of the vehicle, it is important to meticulously assess the functionality and condition of all lights and signals to guarantee top safety and performance on the road. Signal maintenance is essential for ensuring that turn signals, brake lights, and hazard lights are all in proper working order. Regularly check that the lights illuminate brightly without any flickering or dimming, as this could indicate a bulb that needs replacing or an electrical issue.
Additionally, headlight alignment plays a significant role in ensuring the best visibility while driving at night. Misaligned headlights can not only reduce your own visibility but also blind oncoming drivers. To check the alignment, park the car facing a wall about 25 feet away and observe if the light beams are at the same height and parallel to each other. If adjustments are needed, most vehicles have screws near the headlights that allow for minor corrections.
Cleaning Interior and Exterior
After ensuring the functionality of lights and signals, the next step in the maintenance checklist involves thoroughly cleaning both the interior and exterior of the vehicle.
- Vacuuming Carpets: Begin by removing any floor mats and vacuuming the carpets to eliminate dust, dirt, and debris that may have accumulated over time.
- Cleaning Interior Surfaces: Wipe down all interior surfaces such as the dashboard, steering wheel, and door panels with a damp microfiber cloth to remove any dust or grime.
- Waxing Paint: Protect the vehicle’s exterior by applying a coat of wax to the paint. This not only enhances the shine but also acts as a barrier against environmental contaminants.
- Cleaning Windows: Use a glass cleaner to clean the windows both inside and out, ensuring maximum visibility while driving.
- Tire Care: Don’t forget to clean the tires using a specialized tire cleaner to maintain their appearance and prevent cracking.
Keeping Maintenance Records
Maintaining detailed records of your vehicle’s maintenance history is essential for tracking service intervals and ensuring peak performance. Organizing receipts and documentation in a systematic manner can help you keep track of all the work done on your car. By creating a maintenance schedule and setting reminders, you can stay ahead of necessary services and prevent potential issues before they arise.
When it comes to organizing receipts and documentation, consider using a dedicated folder or digital app to store all service records, invoices, and receipts. Make sure to include details such as the date of service, mileage, work performed, and the mechanic or shop that handled the maintenance. This level of organization will not only help you stay on top of regular maintenance but also come in handy when selling your vehicle, as potential buyers often appreciate a well-documented service history.
Creating a maintenance schedule tailored to your vehicle’s specific needs is important for peak performance. Refer to your car’s manual for manufacturer recommendations on service intervals and use this as a guide for scheduling regular maintenance tasks. Setting reminders on your phone or calendar for upcoming services like oil changes, tire rotations, and inspections can help you proactively address any issues and keep your vehicle running smoothly. Remember, a well-maintained car is a reliable car.