

As a professional in the automotive field, it’s astounding to note that a significant number of vehicle breakdowns are due to neglected fluid maintenance. Ensuring your car’s essential fluids are at the proper levels is fundamental for its longevity and performance. From engine oil to coolant, brake fluid to differential fluid, each plays an essential role in keeping your vehicle running smoothly. Join me as we explore the necessary steps and techniques required to check and top off your vehicle’s fluids, providing you with the knowledge and confidence to maintain your car’s health effectively.
Importance of Regular Fluid Checks
Regularly checking your vehicle’s fluids is important for maintaining peak performance and preventing expensive repairs. As a responsible vehicle owner, it is essential to understand the significance of regularly monitoring and maintaining proper fluid levels in your vehicle. Fluids such as engine oil, coolant, transmission fluid, brake fluid, power steering fluid, and windshield washer fluid play essential roles in ensuring that your vehicle functions at its best.
Regular checks of these fluid levels are necessary to prevent major mechanical issues. For instance, low engine oil levels can lead to increased friction and heat, potentially causing engine damage. Similarly, inadequate coolant levels can result in engine overheating, leading to costly repairs. Monitoring transmission fluid is crucial as it lubricates the transmission system, and low levels can cause gear slipping or grinding. Brake fluid is essential for safe braking, and insufficient levels can compromise your vehicle’s braking system, posing a safety risk.
Required Tools and Materials
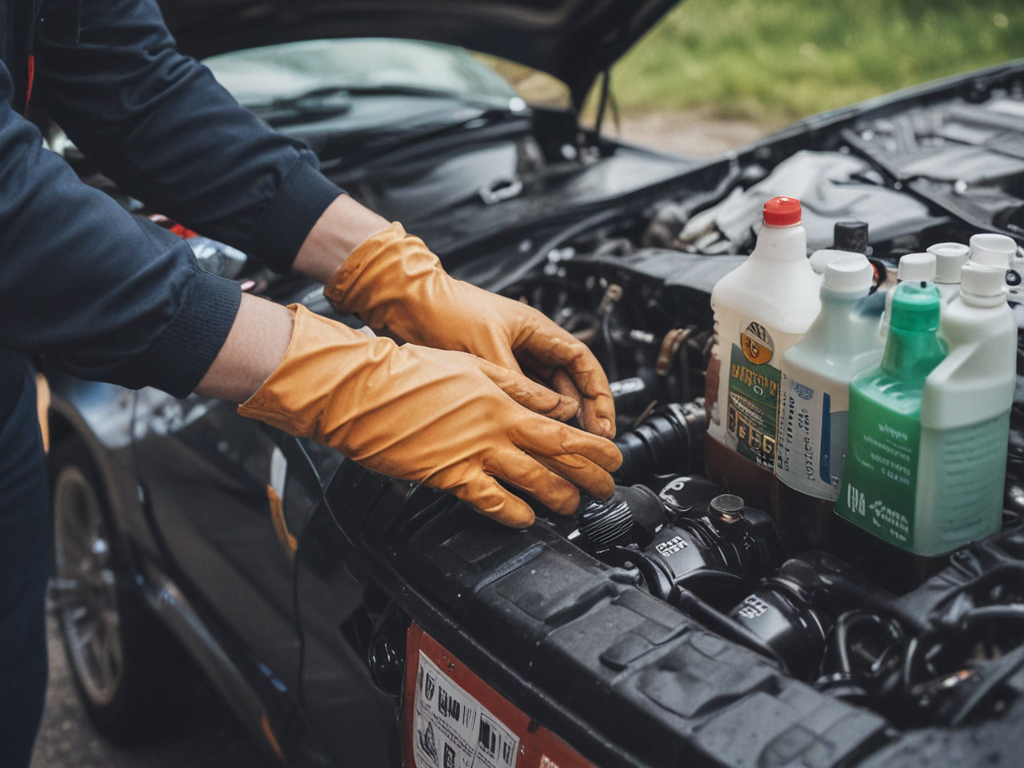
To effectively check and top off your vehicle’s fluids, you will need specific tools and materials readily available. Having the right equipment is important for proper DIY fluid check and maintenance. Below is a table outlining the essential tools and materials you’ll need:
| Tools | Materials | Equipment |
|---|---|---|
| Funnel | Engine Oil | Oil Pan |
| Dipstick | Coolant | Brake Fluid Tester |
| Clean Rags | Transmission Fluid | Battery Terminal Cleaner |
| Safety Gloves | Power Steering Fluid | Fluid Extraction Pump |
| Flashlight | Windshield Washer Fluid | Fluid Catch Pan |
Having these tools at hand ensures you can efficiently perform fluid checks and top-offs without any hassle. The funnel helps prevent spills, while the dipstick is essential for checking oil levels. Clean rags come in handy for wiping any spills or excess fluids. Safety gloves protect your hands from potential chemicals. A flashlight aids visibility in dimly lit areas. The brake fluid tester ensures your brake system is in good condition. The battery terminal cleaner helps maintain a clean and secure electrical connection. Lastly, the fluid extraction pump makes it easy to remove excess fluids. With these tools and materials, you’ll be well-equipped to maintain your vehicle’s essential fluids, promoting the best performance and longevity.
Checking the Engine Oil Level
When checking the engine oil level, it is important to pay attention to the oil level indicator and understand the dipstick measurement method. Ensuring the oil falls within the proper range is essential for ideal engine performance and longevity. Regularly monitoring and maintaining the correct oil level helps prevent costly engine damage and guarantees smooth operation.
Oil Level Indicator
Ensuring proper lubrication, the oil level indicator provides a vital measure of the engine’s oil level. Proper oil level maintenance is vital for optimal engine performance. Checking the oil level indicator regularly helps prevent engine damage and ensures smooth operation. Below is a table summarizing the steps to check the oil level indicator:
| Steps to Check Oil Level Indicator |
|---|
| Park on level ground |
| Turn off the engine |
| Wait a few minutes for the oil to settle |
| Locate the oil dipstick, pull it out, wipe clean, reinsert, and check the oil level |
Regularly monitoring the oil level indicator can help keep your engine running smoothly and avoid costly repairs.
Dipstick Measurement Method
Using the dipstick measurement method is a critical way to check the engine oil level and guarantee proper lubrication in your vehicle. To accurately measure the oil level, insert the dipstick fully, then remove it to observe the oil coating on the stick. The dipstick is calibrated with markings indicating the best oil level range. It is essential to wipe the dipstick clean before reinserting it for a second measurement to guarantee accuracy. Consistency in fluid levels is important, as fluctuations may indicate leaks or engine issues. Variance from the recommended level could lead to inadequate lubrication or potential engine damage. Regularly checking and maintaining the oil level within the specified range is essential for the best vehicle performance.
Proper Oil Range
To maintain proper lubrication and peak engine performance, keeping the engine oil level within the recommended range is essential. When checking the engine oil level, follow these steps:
-
Proper oil viscosity: Confirm the oil viscosity matches the manufacturer’s specifications for your vehicle. Using the wrong viscosity can lead to inadequate lubrication or increased engine wear.
-
Oil change frequency: Regularly change the engine oil as per the manufacturer’s guidelines. Fresh oil helps maintain engine performance and prolongs its lifespan.
-
Checking the oil level: Use the dipstick method to check the oil level accurately. Make sure the oil level falls between the minimum and maximum marks on the dipstick to ensure peak engine function.
Topping Off Engine Coolant
When topping off engine coolant, it is essential to make sure that the vehicle’s engine is completely cool to the touch for safety and best performance. Coolant concentration is key in preventing overheating, so maintaining the right levels is essential. Here is a guide to help you top off your engine coolant properly:
| Aspect | Description | Importance |
|---|---|---|
| Coolant Level | Check the coolant reservoir and add if below the minimum mark. Make sure not to overfill. | Prevents engine overheating. |
| Coolant Type | Use the coolant recommended by your vehicle’s manufacturer. Mixing different types can be harmful. | Ensures proper cooling. |
| Coolant Color | Coolant colors vary, but make sure the new coolant matches the existing one to avoid potential issues. | Helps in leak detection. |
| Coolant Leak Check | Inspect around the coolant reservoir for any signs of leaks like puddles or stains. Address leaks promptly. | Prevents coolant loss. |
| Coolant System Flush | Consider a coolant system flush periodically to remove old coolant and debris for best performance. | Enhances cooling efficiency. |
Following these steps will help you maintain the right coolant levels and ensure your engine stays cool, preventing costly repairs and breakdowns while keeping your vehicle running smoothly.
Inspecting Brake Fluid Level
When checking the brake fluid level in your vehicle, always make sure the engine is cool before proceeding. Inspecting the reservoir regularly is important to ensure your brakes function effectively and maintain top safety on the road. Here are the steps to inspect your brake fluid level safely:
-
Locate the Reservoir: The brake fluid reservoir is typically located near the back of the engine compartment. It is a small, translucent container with minimum and maximum markings on the side. Make sure the vehicle is on a level surface before proceeding.
-
Check the Level: Carefully remove the reservoir cap and check the fluid level against the markings. The brake fluid should fall between the minimum and maximum lines. If it is below the minimum line, it indicates a potential issue that requires attention.
-
Brake Fluid Safety: Brake fluid is a critical component for your vehicle’s braking system. It absorbs moisture over time, which can affect its performance. Always use the recommended type of brake fluid for your vehicle and avoid spilling it on car surfaces as it can damage paint.
Regularly inspecting your brake fluid level is important for safe driving and maintaining your vehicle’s overall health. If you notice any irregularities, consult a professional to address the problem promptly.
Adding Power Steering Fluid
Maintaining your vehicle’s peak performance extends beyond brake fluid maintenance; the addition of power steering fluid is equally important for smooth operation. Power steering maintenance plays a critical role in maintaining the steering system’s functionality. Regularly checking and topping off the power steering fluid can prevent issues such as difficulty steering or strange noises when turning the wheel.
When it comes to power steering fluid, it is essential to monitor the fluid level indicators to make sure that the system is adequately lubricated. Low levels of power steering fluid can lead to increased steering effort and potential damage to the power steering pump. To maintain peak performance, follow these steps to add power steering fluid:
| Steps | Instructions |
|---|---|
| 1. Locate the Reservoir | Find the power steering fluid reservoir under the hood. It is usually a small plastic or metal container labeled with a steering wheel icon. |
| 2. Check the Level | Use the dipstick attached to the cap or a level indicator on the reservoir to check the current fluid level. Make sure it meets the recommended level indicated on the reservoir. |
| 3. Add Fluid if Necessary | If the fluid is below the recommended level, carefully pour the appropriate type of power steering fluid into the reservoir. Be cautious not to overfill. |
Monitoring Transmission Fluid
Monitoring the transmission fluid level regularly is important for top vehicle performance and longevity. Proper transmission maintenance guarantees smooth gear shifts, reduces wear and tear on the transmission components, and helps prevent costly repairs down the road. Here are three key steps to effectively monitor your transmission fluid:
-
Check the Fluid Level: Start by locating the transmission fluid dipstick, usually identified by a red or yellow handle. With the engine warmed up and running, park on a level surface, shift through all gears, and then put the transmission in park. Pull out the dipstick, wipe it clean, reinsert it fully, and then pull it out again to check the fluid level. The fluid should be within the designated marks for proper functioning.
-
Inspect the Fluid Condition: Transmission fluid should be translucent with a reddish hue. If the fluid appears dark, cloudy, or has a burnt smell, it may indicate a problem with the transmission system. In such cases, it is advisable to consult a professional mechanic for further diagnosis and potential fluid replacement.
-
Follow Manufacturer Guidelines: Refer to your vehicle’s owner’s manual for the recommended transmission fluid type and schedule for fluid checks and changes. Adhering to these guidelines will guarantee top performance and longevity of your vehicle’s transmission system.
Regularly monitoring your transmission fluid is a simple yet essential aspect of vehicle maintenance that can help prevent major issues and keep your vehicle running smoothly.
Examining Windshield Washer Fluid
Regularly inspecting the windshield washer fluid level in your vehicle is essential for maintaining clear visibility while driving. The windshield washer fluid plays a vital role in ensuring top cleaning performance for your windshield. Checking the reservoir capacity of the washer fluid is a simple task that can prevent visibility issues caused by dirt, bugs, or other debris obstructing your view while on the road.
To examine the windshield washer fluid, locate the reservoir under the hood of your vehicle. The reservoir is typically a translucent plastic container with markings indicating the fluid level. It is recommended to check the fluid level at regular intervals, especially before long trips or during seasons with high bug activity.
When inspecting the windshield washer fluid, make sure that the reservoir is filled to the recommended level. Maintaining the proper level of washer fluid guarantees that your windshield is efficiently cleaned when in use. Additionally, using a high-quality washer fluid can enhance the cleaning performance, helping to remove stubborn residue and ensuring a streak-free windshield.
Verifying Radiator Coolant
When I check the radiator coolant level in my vehicle, I look for the reservoir located near the engine. It’s important to maintain the right amount of coolant to make sure the proper functioning of the engine cooling system. Here’s how I verify the radiator coolant:
-
Inspect Coolant Level: I visually check the coolant level in the reservoir. The coolant should be between the minimum and maximum marks indicated on the container. If it’s below the minimum mark, it’s time to top it up.
-
Check Coolant Color and Condition: I also observe the color of the coolant. It should be bright and clear, indicating that it’s still effective. If the coolant appears murky or rusty, it might be time for a coolant flush and replacement to maintain proper coolant circulation.
-
Consider Coolant Capacity: Knowing the coolant capacity of your vehicle is important. Refer to your owner’s manual to determine the correct type and amount of coolant needed. Overfilling or using the wrong coolant can lead to cooling system issues.
Refilling Battery Electrolyte
Ensuring the battery’s electrolyte level remains at the appropriate height is essential for the best battery performance and longevity. Proper battery maintenance includes regular checks and electrolyte replenishment to keep it in optimal condition. Electrolyte is a mixture of sulfuric acid and water that facilitates the flow of electrical energy within the battery cells. Here is a helpful table to guide you on how to refill the battery electrolyte safely and effectively:
| Steps to Refill Battery Electrolyte | Tools Needed | Safety Precautions |
|---|---|---|
| Wear safety goggles and gloves. | Funnel | Ensure good ventilation. |
| Check electrolyte level in each cell. | Distilled water | Avoid contact with skin or eyes. |
| If low, carefully add distilled water to reach the fill line. | Battery Hydrometer | Do not overfill. |
| Secure the caps tightly after refilling. | Paper towels | Clean any spills immediately. |
Assessing Hydraulic Clutch Fluid
When examining hydraulic clutch fluid, the key points to take into account are the level of fluid in the reservoir and signs of any leaks in the system. Checking the fluid level regularly guarantees that the clutch system functions at its best, preventing issues like difficulty in shifting gears. Identifying leaks early on can help avoid damage to the clutch components and maintain the overall performance of the vehicle.
Fluid Level Inspection
To properly assess the hydraulic clutch fluid level, begin by locating the reservoir in the engine bay. Once you have found the reservoir, follow these steps to guarantee fluid level accuracy and maintain your vehicle’s performance:
-
Check the Level: Remove the cap from the reservoir and visually inspect the fluid level. It should be between the minimum and maximum marks.
-
Top Off if Needed: If the fluid is below the minimum mark, carefully add the appropriate hydraulic clutch fluid to bring it to the correct level.
-
Monitor Regularly: Make it a habit to check the hydraulic clutch fluid level regularly to prevent issues and address any discrepancies promptly.
Identifying Leaks
Upon inspecting the hydraulic clutch fluid reservoir, any signs of leaks should be carefully examined to ensure the best performance and safety of the vehicle. Identifying leaks early is vital to prevent potential damage and maintain the proper functioning of the hydraulic system. Common signs of a hydraulic clutch fluid leak include a low fluid level in the reservoir, visible fluid on the ground beneath the vehicle, or a soft or spongy clutch pedal. To prevent leaks, it is essential to routinely check the reservoir and surrounding components for any signs of wear, corrosion, or damage. Additionally, ensuring that all connections are tight and secure can help minimize the risk of leaks developing. Regular maintenance and prompt attention to any leaks can prolong the life of your vehicle’s hydraulic clutch system.
Top Off Differential Fluid
I recommend checking the differential fluid level before topping it off to guarantee peak performance and longevity of your vehicle. Proper differential care involves regular maintenance and making sure the fluid levels are adequate. Here are the steps to top off your differential fluid properly:
-
Locate the Differential: The differential is usually found at the rear axle of rear-wheel-drive vehicles or on both the front and rear axles of four-wheel-drive vehicles. Consult your owner’s manual if you are unsure of its location.
-
Prepare the Vehicle: Park on a level surface and engage the parking brake for safety. Make sure the engine is off and the car is in park or gear for manual transmissions.
-
Check and Top Off: Clean the area around the differential fill plug, remove it, and insert a finger to check the fluid level. If it’s low, carefully add the recommended fluid a little at a time until it reaches the bottom of the fill hole. Be cautious not to overfill.
Regular differential maintenance is important for the smooth operation of your vehicle. By following these steps and checking levels as part of your routine maintenance, you can help prevent costly repairs and make sure your vehicle performs at its best.
Checking Transfer Case Fluid
The process of checking transfer case fluid is essential for maintaining peak performance and longevity of your vehicle. Transfer case maintenance is often overlooked but plays an important role in making sure that power is distributed evenly to all wheels. To begin, park your vehicle on a level surface and engage the parking brake for safety. Locate the transfer case, usually found between the front and rear wheels, underneath the vehicle.
Next, identify the transfer case fluid level signs. Most transfer cases have a fill plug and a drain plug. The fill plug is typically located higher up on the case while the drain plug sits lower. To check the fluid level, remove the fill plug using the appropriate tool. Insert your finger or a small tool into the hole; the fluid should be close to the bottom of the fill plug hole. If the fluid is low or appears dirty, it’s time for a transfer case fluid change.
Regularly checking and maintaining transfer case fluid is important for the overall health of your vehicle’s drivetrain. By following these simple steps, you can make sure that your transfer case operates smoothly, prolonging the life of your vehicle.
Final Tips and Recommendations
As we wrap up the discussion on checking and topping off vehicle fluids, it’s essential to highlight a few key points. Firstly, remember to adhere to your maintenance schedule diligently to guarantee peak performance. Secondly, familiarize yourself with fluid level indicators in your vehicle to detect any potential issues early on. Lastly, consider seeking professional maintenance services periodically to secure the longevity and efficiency of your vehicle.
Maintenance Schedule Reminder
For an extensive vehicle maintenance schedule reminder, it is important to adhere to the manufacturer’s recommended service intervals to guarantee top performance and longevity of your vehicle. When it comes to fluid maintenance tips and vehicle fluid care suggestions, here are three key points to keep in mind:
-
Follow the Owner’s Manual: Regularly review your owner’s manual to understand the specific service intervals recommended by the manufacturer for different fluids in your vehicle.
-
Consider Your Driving Conditions: Adjust your maintenance schedule if you frequently drive in severe conditions such as extreme temperatures, towing heavy loads, or stop-and-go city driving.
-
Consult with Professionals: When in doubt or if you’re unsure about the maintenance schedule, seek guidance from qualified mechanics or service advisors for personalized recommendations.
Fluid Level Indicator Explanation
How can you easily interpret your vehicle’s fluid level indicators for effective maintenance monitoring? Understanding indicator lights is important. These lights illuminate on the dashboard to alert you of potential issues. Fluid level sensors are responsible for detecting the amount of fluid in your vehicle’s systems. Learning to interpret dashboard warnings is essential for timely action. When a warning light appears, it’s important to address the situation promptly. Troubleshooting fluid issues promptly can prevent major problems. Regularly checking and understanding these indicators can help you maintain your vehicle’s health and performance. By staying attentive to these signals, you can address minor concerns before they escalate, ensuring a safe and smooth driving experience.
Professional Maintenance Recommendations
Interpreting your vehicle’s fluid level indicators accurately is essential for proactive maintenance; now, let’s explore some professional maintenance recommendations to guarantee top performance and longevity.
- Regular Inspections: Schedule routine checks with a trusted mechanic to make sure all fluid levels are at the best and there are no leaks.
- Follow Manufacturer Guidelines: Adhere to the manufacturer’s recommendations for fluid types and change intervals to maintain peak performance.
- Address Sensor Warnings Promptly: If fluid level sensors indicate low levels or issues, seek professional assistance immediately to prevent potential damage.